DIY: Butterfly Drinker
With Spring on its way, it’s time to think about our butterflies and ways that we can help them thrive. One of the most fun ways to cater for our butterflies, and bees, is to create a upcycled drinker using items we otherwise would throw away!
Let’s begin!
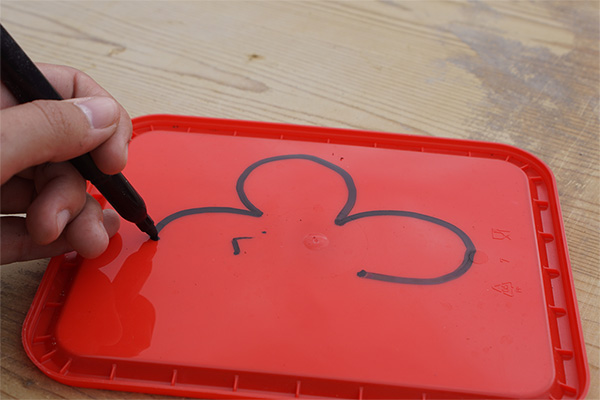
Step 1: Draw your design onto a piece of plastic. We went for an ice-cream tub lid.
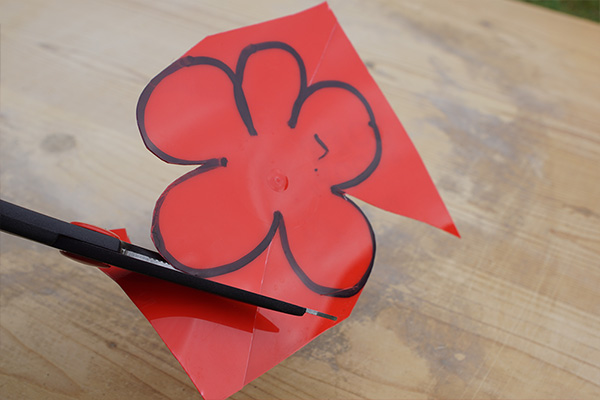
Step 2: Cut out your design. You can use scissors to do this, or a Stanley knife – always get an adult to help here!
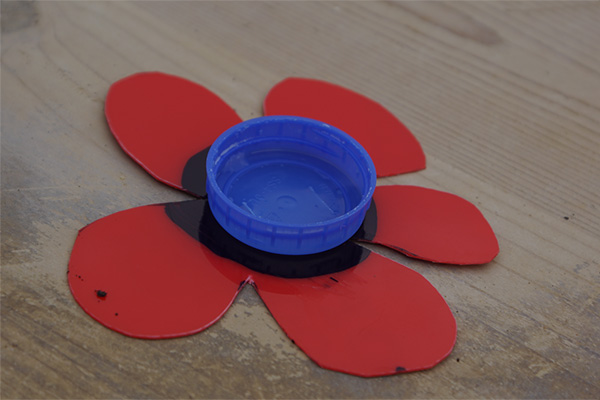
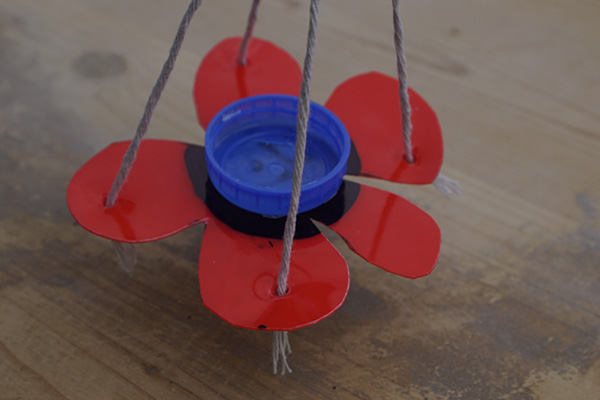
Step 3: After you have cut out your design. Stick a bottle cap to the centre. You can use glue or sticky tape.
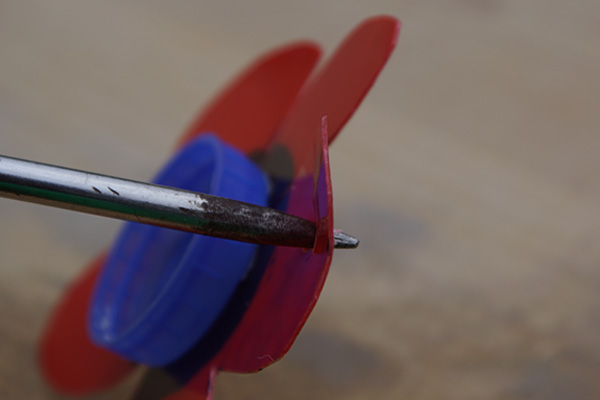
Step 4: Use a screwdriver or a pin to make a hole in each of your petals (4 in total).
Step 5: Thread some string through the holes and tie into a knot at the top.
Step 6: Use an old sponge (we’ve used a dish-sponge) and cut a disk into the same size as your bottle cap.


Final Step: Once your drinker is all created. You can make your own Sugar Solution to soak your sponge in it before putting out into a sunny spot in the garden. A place in the sun around the plants is the ideal location.